
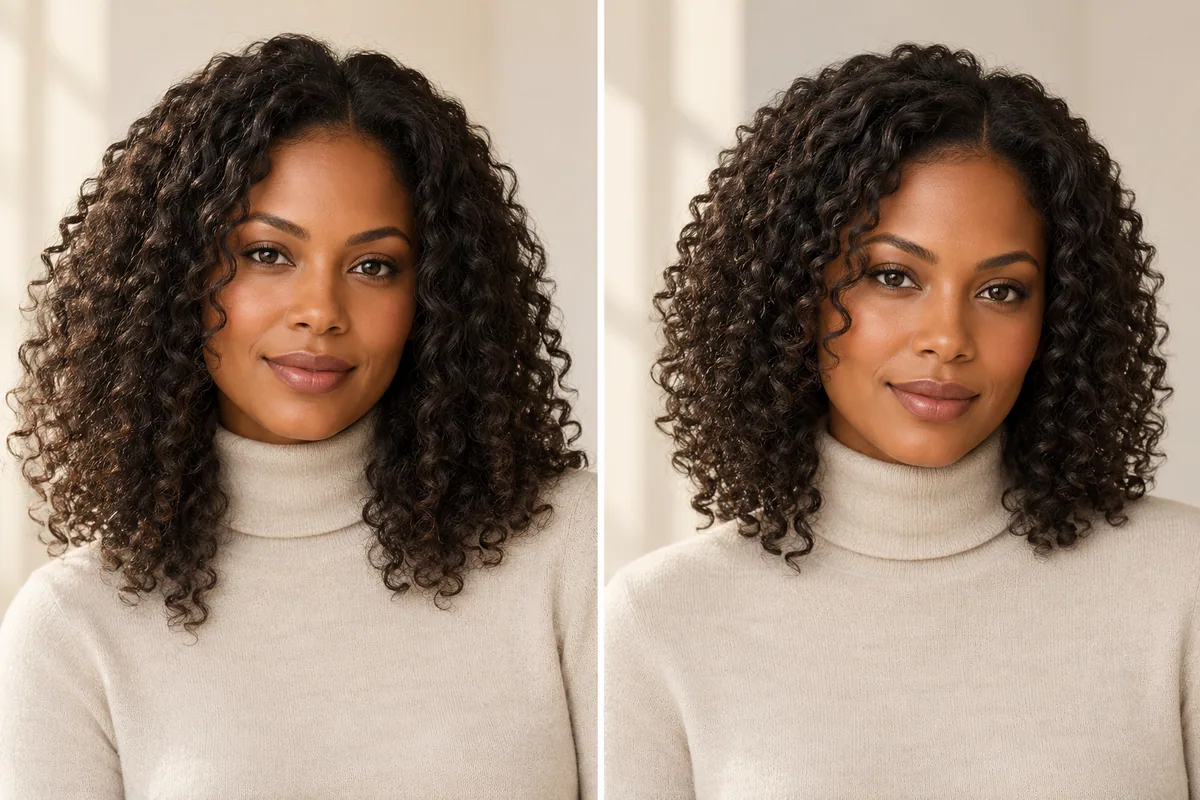
Face-framing layers for curly hair can shape the sides around your cheeks and jaw while leaving the forehead open. You do not have to add short bangs to ask for more definition at the front. Start with the dry position of the shortest side pieces, then discuss how they would connect to the longer curls.
Perhaps you like your overall length but feel that the front does not show much shape. Perhaps you keep saving fringed references even though you do not want hair across your forehead. The useful part of those photographs may be the curved frame beside the face, which is a separate choice from the fringe.
Say what you mean by an open forehead
Before comparing layers, decide which part of the front you want left clear. “No bangs” can still leave questions about how far forward the shorter side pieces should sit. A reference can make that preference easier to explain.
Point to the area you want open and the area where you would welcome shorter curls. You might want the first visible frame near the cheek, or prefer it to stay lower toward the jaw. Choose the look you prefer, then ask the stylist how to achieve it on your hair.
If you do want shorter curls entering the forehead area, the curly curtain-bangs article is the more relevant guide. This page keeps the forehead open and focuses on the side frame.
Bring the curls as you actually wear them
Ouidad's haircut consultation advice emphasizes letting the stylist see the natural dry shape before the haircut process begins. That supports a useful preparation step: bring photographs that show your ordinary curls rather than only a stretched or heavily arranged version.
Choose a front view and a side view of your starting hair. If the curls vary noticeably across wash days, bring a second everyday example. You are giving the stylist context, not trying to prove that your hair belongs in one rigid category.
Keep those photographs separate from your inspiration images. One set shows the hair being assessed; the other shows the appearance you would like to explore. They can be compared without assuming that two people's curls will behave alike.
Choose the dry endpoint, not a stretched measurement
Find the shortest side piece in your target reference. Where does it appear when the curl is sitting normally? Look at the whole curl, including the end, rather than pulling the shape straight in your imagination.
Use a landmark such as cheek, jaw or chin to discuss the intended appearance. Ask the stylist to explain how they would work toward that point. Do not calculate a universal amount of shrinkage from a website or a generated picture.
Also identify the length you want to preserve behind the frame. A shorter side curl can change the front impression even if the rest of the hair stays long. You should understand which sections would change and which would remain before agreeing on the plan.
Trace the connection into the longer curls
Cover the center of your reference and look at one side alone. Does the frame connect gradually into the length? Is there a deliberately visible gap between shorter curls and longer ones? Is the roundness near the cheek the part you like, or do you prefer a longer line beside the jaw?
Now look at the other side. The two sides do not have to be visually identical for you to like the result. What matters is knowing whether you are choosing a balanced overall outline, a noticeable side emphasis or simply an open front.
On a small screen, swipe the table to compare every column.
| Reference detail | What it helps you describe | What a photo cannot establish |
|---|---|---|
| Shorter side curls near the cheek | Where you want the frame to begin visually | The exact cutting length on your hair |
| Longer pieces near the jaw | A quieter change at the front | Whether the curls will tuck or stay back |
| A gradual connection into the length | How continuous you want the side outline to look | The technique needed on the starting cut |
| A more separated frame | How visible you want the shorter sections to be | How your own curls will group after washing |
If you are considering shortening the whole haircut as well, use short curly haircut planning to make that decision separately. Otherwise, a large length change can make it hard to judge the smaller front adjustment.
Check the frame with your normal part and accessories
Show the stylist your usual part rather than arranging a new center part only for the reference photo. Explain whether you change it regularly or tend to wear the same opening. That is useful context for discussing the two sides of the frame.
If you wear glasses, look at where the curls meet the temples and the top rim. If you use headphones, clips or a work hair tie, demonstrate the action you need to retain. You may prefer the look of a shorter side frame but decide that keeping a certain section longer matters more.
Our hairstyles with glasses guide offers a more detailed frame-and-fringe comparison. Keep the observation practical: what you want to see and what you need to be comfortable doing.
Use a smaller reference set
Three useful images are enough to start a good conversation. Choose one for the open forehead, one for the side endpoint and one for the connection into the longer curls. Add a short note to each so the stylist knows which feature matters.
Do not make the stylist guess why three different haircuts are in the folder. “This one for the side length only” is a useful instruction. It stops a preferred color, density or styled finish from becoming an accidental part of the haircut request.
The bangs and face-framing layers comparison can help if your references still mix the categories. You do not need to remove every fringed image; you need to identify the feature you are borrowing from it.
Explore an open-front curly shape in Hair Magic
Start with a clear photo. Browse the available curly hairstyles and choose the closest open-front direction. Use the supported length, parting or layer details for that style; the app may not have a preset named after the exact reference.
Keep the color steady while comparing the outline. Tap Generate when ready to upload the photo for cloud processing. Internet is required. Review the result beside your original, using the curly try-on guide for the workflow.
Inspect where the generated frame sits beside the cheek and jaw. Ignore any extra fullness or changed curl pattern when judging whether you like that outline. The preview cannot reproduce individual curl behavior, measure shrinkage or establish the correct cutting section.
Hair Magic is free to download with in-app purchases; current preview access is shown in the app. Save a useful image as an appearance reference and keep your real dry-hair photos alongside it.
Finish with three clear priorities
Write down the area you want open, the dry endpoint you like and the length you want to preserve behind it. Then add any everyday requirement the shorter pieces must respect.
For example, a fictional brief could read: “Keep the forehead clear. I like a visible frame beside my cheeks that connects gradually into the longer curls. Please assess the dry endpoint on my hair, and show me which sections would no longer secure into my usual clip.”
Organize the chosen style and practical notes in a Salon Card. You can leave the consultation with a precise front-shape plan without needing a short fringe—or a completely different haircut—to make the change feel worthwhile.
About this guidance. Published by Hair Magic, the app discussed here. Product details are based on the Hair Magic App Store listing, checked on 1 November 2026. This is planning guidance, not a professional assessment of your hair. AI previews are visual estimates; features and prices may change.
Read our editorial approach or explore all journal articles.