
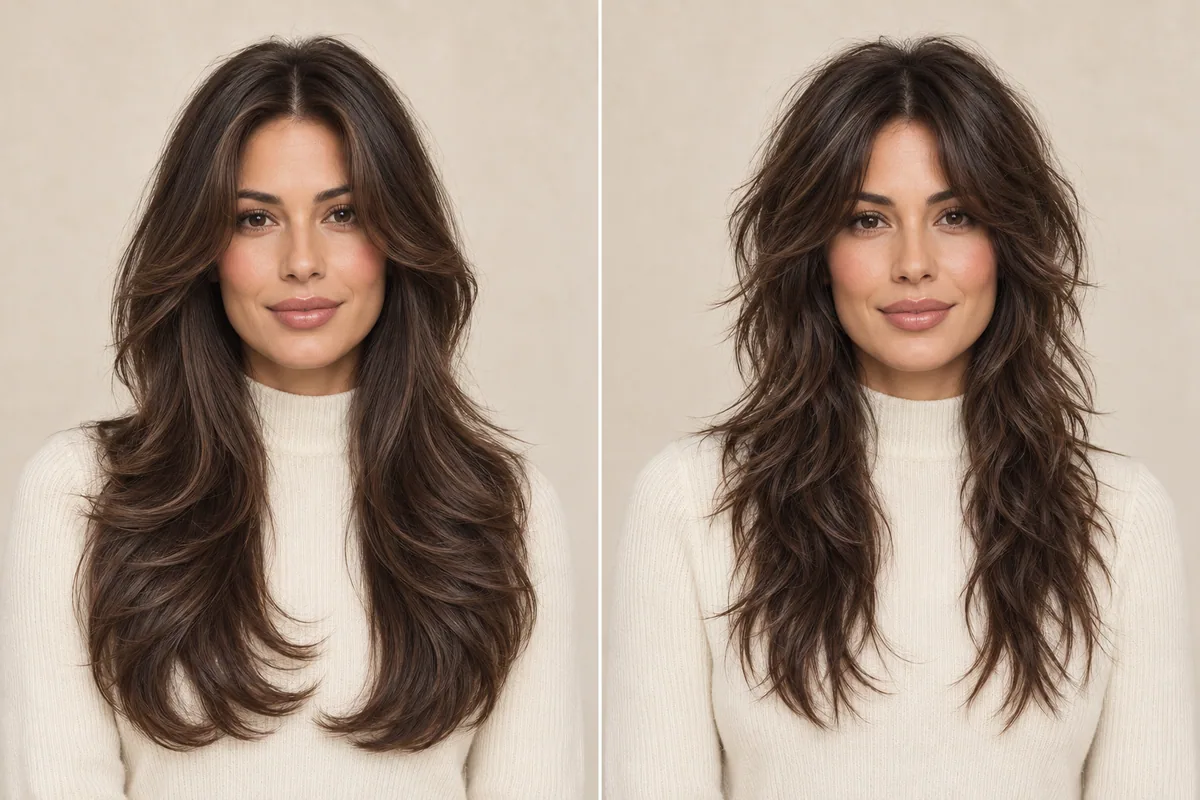
A butterfly cut usually suggests sweeping face-framing layers with longer lengths underneath. A wolf cut usually suggests a shaggier outline, shorter upper layers and a more noticeable contrast with the ends. When you compare a butterfly cut vs. a wolf cut, the useful question is where you want the shorter hair to sit—not which trend name sounds more current.
You can like both photographs and still want quite different haircuts. Perhaps you want the butterfly reference's curved front pieces, but the wolf reference's lighter-looking neckline. Or perhaps both pictures appeal mainly because the hair has been styled beautifully. Before booking, separate those details.
Look at the outline before the labels
L'Oréal Paris's butterfly haircut guide distinguishes a softer, feathered butterfly direction from a choppier, shaggier wolf direction. Treat that as a useful visual starting point. It does not mean every cut carrying either label follows one fixed recipe.
Cover the face in each reference with your thumb. Look at the top, the area beside the cheeks and the last few inches. Is the change you want near the crown, around your face, or mainly at the bottom? A clear answer is more helpful than trying to decide which photograph is the more authentic version of a trend.
Then reveal the face again. Does the fringe account for much of the difference? A wolf reference with a dense forehead fringe and a butterfly reference with an open front are changing two things at once. You may need a second pair of images to judge the layers fairly.
Compare four parts of the cut
On a small screen, swipe the table to compare every column.
| Area to inspect | In a butterfly-inspired reference | In a wolf-inspired reference | Your question |
|---|---|---|---|
| Upper outline | Look for sweeping movement and how it connects downward | Look for the amount of shorter, separated upper hair | Where would my shortest upper section end? |
| Front | Identify the frame beside the face | Separate fringe from the layers behind it | Do I want this forehead coverage? |
| Lower lengths | Check how much of the long outline remains visible | Check the contrast between upper shape and ends | How substantial do I want the bottom to look? |
| Finish | Notice curved ends, lift and arranged pieces | Notice separation, waves or deliberately tousled pieces | Which parts of this appearance come from styling? |
The table is an observation exercise, not a cutting specification. Your stylist needs to assess the starting hair before saying how to create the appearance you have selected.
If your actual choice is between pronounced front layers and a quieter overall change, the butterfly cut versus long layers comparison is the better next read. If the shaggier side of this comparison interests you, wolf cut versus shag helps narrow that direction.
Choose how much contrast you want
Imagine drawing a line across the point where the upper shape changes into the longer ends. In some references, you barely notice a boundary. In others, the top and bottom look intentionally distinct. Neither is a requirement for your hair. What matters is whether you enjoy that contrast.
Write one of these observations beside each saved picture:
- The short pieces are the part I want people to notice.
- I like the movement, but I want the lower outline to remain the main shape.
- I like the front; I am undecided about the crown.
- I like the finish more than the underlying cut.
These statements prevent an enthusiastic “I love this” from becoming permission for every detail in the photograph. You can ask for one feature and decline another.
An overhead or rear reference can help if the upper layers are central to the decision. A front portrait alone may show an appealing fringe while revealing very little about how the rest of the haircut is arranged. Ask for another view rather than filling in the missing information yourself.
Separate the fringe decision
A sweeping side frame does not automatically mean short bangs. Equally, a shaggier overall shape does not require the precise fringe shown on somebody else's head. Make your forehead-coverage choice before you start describing the whole cut.
Try saying: “Keep this outline beside the cheeks, but leave the center more open.” Or: “I like the shorter forehead pieces, but I don't want the rest of the upper hair this short.” Those requests give a stylist something concrete to discuss.
Our butterfly haircut with bangs guide compares curtain, wispy and open-front versions. Keep the fringe question there; use this page to choose the relationship between the upper layers and the longer outline.
Bring an ordinary-day reference
An arranged salon photograph is useful for explaining what attracts you. It is less useful as a promise about Tuesday morning. Find a second reference closer to how you normally wear your hair: straight and relaxed, naturally waved, curled, or deliberately styled.
Notice whether a reference's ends turn outward because they have been arranged that way. Notice whether the upper lift is the feature doing most of the work. Ask what the proposed cut would look like with the amount of styling you actually enjoy, including occasions when you choose to do more.
For waves, the wavy butterfly haircut guide focuses on dry bends and front-layer landmarks. Your own photographs from different wash days can be more informative than somebody else's texture label.
Preview two directions in Hair Magic
Use one clear original photo for the comparison. Browse Hair Magic's available medium or long layered hairstyles and choose the closest direction. The catalog may not use the same trend names as your references. Length, fringe, layer and texture details are available only where the selected style supports them.
Keep the hair color consistent while you explore the shape. Generate one preview, compare it with the original, then explore a different supported layered direction. Generation uploads the photo for cloud processing and requires an internet connection. Follow the photo hairstyle try-on guide if this is your first comparison.
Inspect the shortest-looking pieces and the bottom edge rather than choosing the image with the most dramatic volume. A generated preview cannot establish how much density your real ends will retain, how layers will fall or how much work the finish needs. It can help you decide which outline you want to discuss.
Hair Magic is free to download with in-app purchases. Check current preview access in the app; a free download does not establish a free-generation allowance. Save a useful result to Photos if you want to keep it as a reference.
Make a four-line haircut brief
Before the appointment, fill in these lines:
- Overall shape: a connected, sweeping outline or more visible contrast between upper layers and ends.
- Front: the forehead coverage and shortest face-framing point I prefer.
- Keep: the length, fullness or tie-back reach I do not want to give up.
- Routine: the finish I wear on an ordinary day and the styling I willingly do.
For example, a fictional brief might read: “I like the more separated upper shape in the wolf reference. Keep my lower length and an open forehead. Before deciding, show me which upper sections would become shorter and what the lower outline would look like.”
Use a Salon Card to organize the chosen style, color and practical notes. If the preview is only partly right, say so. “The front is useful; ignore the extra fullness” is a better instruction than treating the entire image as a plan.
You do not have to settle the terminology perfectly. You need to leave the consultation knowing which parts will be shorter, which parts will stay, and which features of the reference you have actually chosen.
About this guidance. Published by Hair Magic, the app discussed here. Product details are based on the Hair Magic App Store listing, checked on 1 November 2026. This is planning guidance, not a professional assessment of your hair. AI previews are visual estimates; features and prices may change.
Read our editorial approach or explore all journal articles.