
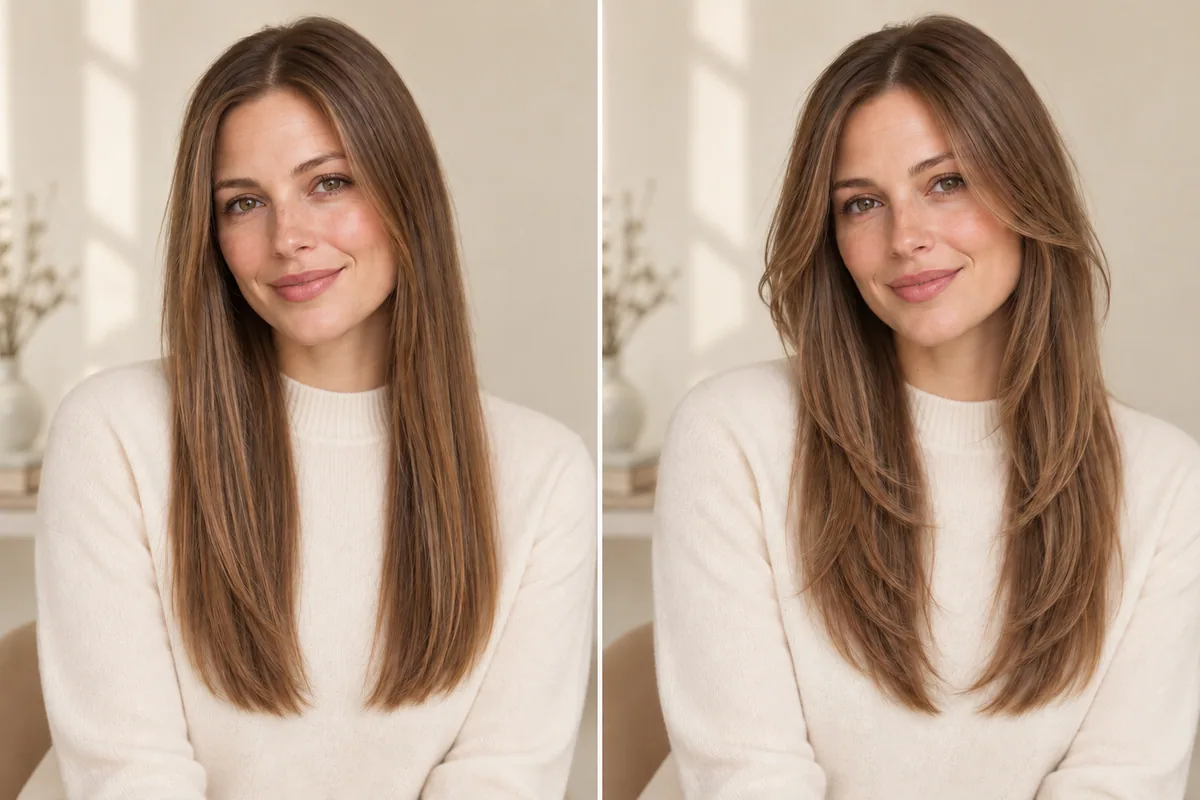
A butterfly haircut for fine hair deserves a specific conversation about the shorter layers and the amount of hair left near the longest ends. Fine strands do not automatically rule the cut in or out. The decision is whether the proposed layer pattern can create a shape you enjoy while preserving the lower outline you want to keep.
Begin with your actual concern. Do you want more movement beside the face, less length, a clearer edge or a style you can wear with little arranging? “Make it look thicker” leaves all those different goals unresolved. A reference photo can help, but neither a haircut name nor an AI image can establish what your real ends will look like.
Fine strands and low density are different questions
Fine describes individual strand size. Density concerns how much hair is present. L'Oréal Professionnel stylist Jose Ramón explains that distinction in Hair.com's fine-versus-thin hair guide. You can have fine strands without having the same density as another person whose hair is also described as fine.
That is why a blanket answer to “Is a butterfly cut good for thin hair?” is not very useful. People use thin to mean different things, and a photo does not give a stylist everything they need to assess your starting point. Describe what you can see and what bothers you, then let the consultation fill in the technical detail.
This article is about choosing a haircut shape, not diagnosing changes in hair density. If you want a broader comparison of shorter and longer possibilities, our haircuts for fine hair guide covers that first decision. The focus here is the layered butterfly direction and its relationship to the bottom edge.
Mark the lower outline you want to preserve
Take a photograph of your current hair in its usual dry finish. Choose a background against which you can see the ends clearly. Keep the hair in a normal position rather than spreading it out to make the bottom look wider.
On a copy of the photo, mark the area you like near the lowest ends. You might want to keep the current longest length, retain the side lengths or have a more continuous-looking edge across the bottom. These are different preferences. Put them into words before looking at another dramatic layered reference.
Next, mark the part you would most like to change. Perhaps the front feels too long, while you already like the back. That could lead to a more focused consultation than asking for shorter layers everywhere. The blunt cut versus layered hair comparison explains why the outside outline and the layers within it should be discussed separately.
Your marks are a communication aid, not instructions for where to cut. A stylist still needs to examine the hair, explain the proposed lengths and show what would change.
Compare the layer pattern at a similar overall length
Hair.com's butterfly haircut guide describes shorter upper sections combined with longer hair beneath. The important question for this consultation is how much contrast you want between those lengths. A subtle front change and a strongly separated upper shape are not interchangeable just because both references have long ends.
On a small screen, swipe the table to compare every column.
| Your priority | Look closely at | Ask before agreeing |
|---|---|---|
| Keep a substantial-looking lower edge | The amount of hair visible near the longest lengths | “What would remain at this edge with the layers you suggest?” |
| Add movement beside the face | The shortest front pieces and where they connect | “Can the main change stay in this area?” |
| Keep a ponytail or clip | The particular sections you need to secure | “Will these pieces still reach my usual fastening point?” |
| Wear a relaxed straight finish | Layer placement without strongly curled ends | “Can you show a similar shape with less styling?” |
| Keep most of the length | Both the center and the outer lengths | “Which sections would become noticeably shorter?” |
Use the butterfly haircut versus long layers article if the amount of change is still unclear. For shoulder or collarbone lengths, the medium-length butterfly guide gives a more specific landmark exercise.
Read the ends, not just the impressive top half
Styled volume can dominate an inspiration photo. Cover the top half for a moment and examine the lower lengths alone. Do you like how the ends look? Then uncover the image and ask whether you prefer the actual placement of the shorter sections or mainly the lift and curved finish.
Look for a second reference with less arranging. If you cannot find one, ask the stylist to explain what they expect the same idea to look like in your ordinary routine. You do not need to assume that an unstyled version will be bad; you need enough information to decide whether you would enjoy it.
Avoid treating the largest-looking hair as the best outcome. If a reference has obvious fullness that differs from your starting point, annotate it: “I like the front length; the volume is not my target.” That one sentence can prevent an image from promising more than it can support.
The editorial illustration on this page compares the visibility of layers. It does not prove that either option will preserve a particular density, and it is not a real person's haircut experiment.
A consultation worksheet for the tradeoff
Fill in these four lines rather than collecting another dozen references:
- Keep: the length or part of the outline that matters most to me.
- Change: the one area where I want more movement or a shorter shape.
- Routine: how I wear the hair on a typical day, including styling I actually enjoy.
- Limit: what I would rather keep than sacrifice for a stronger layered effect.
For example: “Keep the lower edge near my collarbone. Change the front so it feels less long beside my face. I wear it straight most weekdays. If more layers would leave the ends looking less substantial than I want, I would prefer a smaller change.”
Another person might write: “Keep the longest length for my low ponytail. Add a more visible upper shape. I enjoy arranging the front, but I want you to show me which sections would no longer reach the tie.” These are fictional planning examples, not accounts of results from a salon.
Ask the stylist which part of the request they would adapt and why. A useful consultation should leave you able to describe the planned change without relying on a promise of “instant volume.”
Preview the shape without treating added fullness as evidence
Hair Magic lets you explore an available layered hairstyle on your photo. Keep the color steady and select the closest medium or long layered style. Available length, layer and texture details vary by style, and the catalog may use a different name from your reference.
After you tap Generate, your photo is uploaded for cloud processing and internet is required. Compare the result beside the original. Look at the front length, the lower outline and the amount of visible neck or shoulder. If the generated hair seems fuller, do not count that as proof that the cut would produce the same appearance.
The photo try-on guide explains how to make a focused comparison. Save the image that best communicates your preferred shape, even if you need to write “assess the ends on my real hair” beside it. Hair Magic is free to download with in-app purchases; current preview access is shown in the app.
Bring the chosen direction and your four-line worksheet to the appointment, or organize the selected style and practical notes with a Salon Card. Before cutting begins, ask the stylist to show the shortest proposed section and explain what stays at the bottom. That answers the question a polished preview cannot: what this plan means for the hair you actually have.
About this guidance. Published by Hair Magic, the app discussed here. Product details are based on the Hair Magic App Store listing, checked on 18 October 2026. This is planning guidance, not a professional assessment of your hair. AI previews are visual estimates; features and prices may change.
Read our editorial approach or explore all journal articles.