
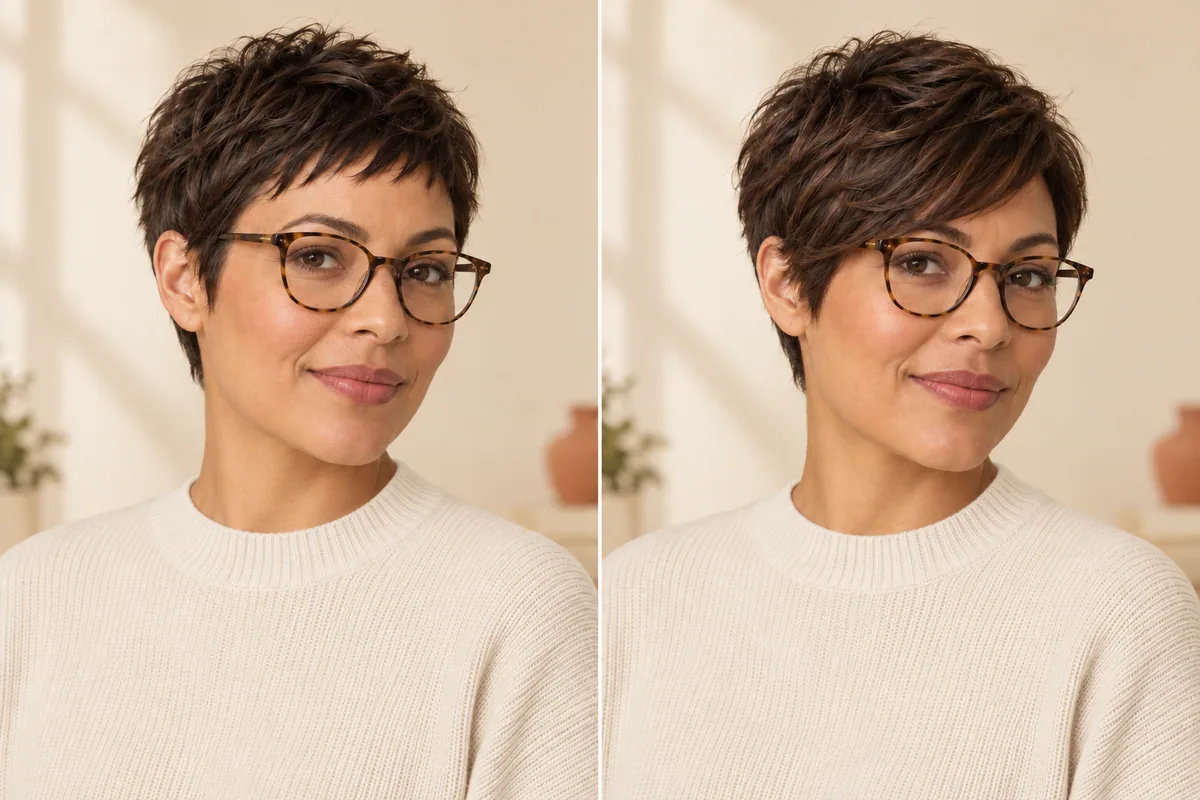
To choose a pixie cut with glasses, compare the fringe near the upper rim, the hair at the temples and the amount of frame you want visible beside the ears. Keep your everyday glasses in the reference. A different pair can change the composition enough to distract you from the haircut you are trying to choose.
There is no single pixie shape reserved for a particular frame shape. You might prefer a short, open front that lets the glasses stand out, or a longer sweep that places them within a softer border of hair. Appearance is only half the decision: bring the actual frames to the salon so you can discuss how you put them on, take them off and arrange your hair around them.
Break the pixie into three areas
“Short at the sides” and “a little length on top” leave a lot unresolved. Look at the fringe, the temple area beside the frame arms, and the hair in front of or above the ears. You may have a different preference for each.
Professional short-cut examples illustrate that these details can be designed separately. In Modern Salon's pixie feature with educator Adrian Sandoval, the discussion and images distinguish the back and sides from the crown and top. That is useful background for asking about the complete shape, rather than choosing it from one attractive front angle.
The source is a haircut demonstration, not research into glasses comfort. The worksheet below helps you describe your own observations; the stylist needs to assess the real hair and frames in person.
If you are still deciding how much length to lose, begin with what to consider before getting a pixie cut. If you want more length around the sides, the bixie, pixie and bob comparison may help you find a more useful starting reference.
Keep one pair of frames in the first comparison
Choose the glasses you wear most, even if a special pair looks better with a favorite inspiration image. Take a straightforward front photo and a side photo in even light. Leave enough room around the head to see the ears and upper frame line clearly.
In the front view, note how much of the eyebrows and upper rims you want visible. In the side view, notice where you would like hair relative to the frame arm. Avoid deciding that one overlap is universally good or bad. Write the preference in your own terms: “I want this part of the arm visible” or “I like a small piece in front of the ear.”
If you regularly wear a second pair, repeat the check with it after choosing a general direction. A reference that works visually with thin metal frames may feel quite different beside a stronger rim. That is a reason to compare both, not a reason to obey a rule matching glasses to haircuts.
The broader hairstyles with glasses guide covers frames at different hair lengths. For a pixie, pay particular attention to the areas that longer hair currently covers.
Decide where you want the fringe to stop
A short fringe can leave a clear gap above the upper rim. A longer front may be worn to one side or sit nearer the glasses. The exact position in a styled photograph does not establish where your hair will settle without arranging.
Point to a preferred dry length on your own face or a marked reference. Then explain whether you want the fringe above the frame, beside it or softly overlapping part of it. Ask what the proposed front would look like when you wear your usual texture and how it may need to be arranged.
Separate appearance from irritation. You might like a piece across the outer corner of a frame in a photograph but dislike moving it when reading. Say so. A still image cannot tell you how often that gesture would be needed, and an AI preview cannot predict growth direction or contact with the lenses.
A frame-contact worksheet for your appointment
Try the everyday actions that matter to you with your current haircut, then write what you would want preserved or changed. This is a record of your routine, not a test that can certify a proposed cut's fit.
On a small screen, swipe the table to compare every column.
| Area or action | What to notice now | What to ask about the proposed pixie |
|---|---|---|
| Upper rim and fringe | Where hair tends to sit near your eyes and lenses | “Where would the shortest front finish in my normal dry texture?” |
| Temple and frame arm | Whether you prefer hair covering or clearing the arm | “Can we look at this side area with my glasses on?” |
| Hair in front of the ear | Whether you like a distinct longer piece | “How short would this become, and what would be visible?” |
| Taking glasses off | Whether you move hair first or leave it alone | “Which front or side pieces would I need to rearrange?” |
| Changing to another pair | Differences in the rim or arm position | “Can we check the outline with both pairs before deciding?” |
Bring your actual glasses rather than trying to describe them from memory. If your normal routine also includes headphones or another accessory, demonstrate that combination. A haircut consultation cannot replace an assessment of the fit of the glasses themselves, but it can account for the way you wear them.
Open temples and soft side pieces give different impressions
A more open temple area can make the frame arm and ear more visible. Longer side pieces can create a border around them. Neither is inherently more flattering; compare which composition you enjoy at the same fringe length before changing several details at once.
In the generated illustration above, the fictional subject wears the same frames in two different short shapes. It is a visual planning example. It does not show real comfort, prove that the frames will remain in place or demonstrate how your own hair would move when taking them off.
Look beyond the front as you build a reference folder. Ask for a side view of the cut you like, particularly if the length near the ears is important. A side view can reveal that the feature you admired from the front was longer or more closely cropped than you assumed.
Two requests you can adapt
For a more open shape: “I would like the upper rims and frame arms to stay visible. I like this shorter fringe, but please assess where it would sit with my hair's natural direction. Show me the sides with my glasses on before we settle the length.”
For a softer front: “I like the longer sweep and a little hair in front of the ear. I do not want a piece that I have to keep moving away from the lens. Can you show me which parts of the reference need daily arranging and what a simpler finish would look like?”
These are hypothetical briefs, not reports from tested haircuts. Add your own main priority rather than copying every sentence. One clear preference about the front and one practical limit are enough to start a useful conversation.
Use Hair Magic for the visual shortlist
Choose a clear photo wearing your main pair of glasses, with glare kept away from the areas you want to compare. The photo selection guide explains lighting and framing. In Hair Magic for iPhone, browse a supported pixie direction and keep your current color while evaluating the shape.
Adjust bangs, length or parting where the selected style offers them. Review the choice, then tap Generate. The photo uploads for cloud processing and internet is required. Follow the pixie cut preview guide if you are using this workflow for the first time. Hair Magic is free to download with in-app purchases; check the app for your current preview access.
Before judging the hair, compare the generated glasses with the original. If the rim, arm or face has changed, that part of the image is unreliable. The AI preview accuracy article explains why a convincing picture still needs interpretation.
Keep the preview for the broad fringe and side shape you like, then take it and your actual glasses to the appointment. You can organize the selected style and practical notes with a Salon Card. Ask the stylist to assess the contact and daily handling on your real hair; the app cannot make that check for you.
About this guidance. Published by Hair Magic, the app discussed here. Product details are based on the Hair Magic App Store listing, checked on 18 October 2026. This is planning guidance, not a professional assessment of your hair. AI previews are visual estimates; features and prices may change.
Read our editorial approach or explore all journal articles.